
The Complete Guide to Choosing the Right Tile Adhesive for Durable, Long-Lasting Installations The Complete Guide to Choosing the Right Tile Adhesive for Durable, Long-Lasting Installations
Quick Answer
The best adhesive for large format and vitrified tiles is a polymer-modified, high-bond-strength cement adhesive rated C2 (or C2 S1/S2 for extra flexibility) under EN 12004. Ordinary cement mortar cannot bond properly with dense, low-absorption vitrified tiles and is not suitable for formats above 600 mm.
Introduction
The demand for large format and vitrified tiles has grown significantly in recent years. Their sleek appearance, minimal grout joints, and modern aesthetics make them a preferred choice for residential homes, commercial buildings, hotels, hospitals, shopping malls, and luxury interiors.
However, installing these tiles is not as simple as laying conventional ceramic tiles. Their larger size, heavier weight, and extremely low water absorption require a specialized tile adhesive that provides superior bonding strength, flexibility, and long-term durability.
Many installation failures — hollow tiles, debonding, cracked joints, tile slippage, and uneven surfaces — happen not because of poor-quality tiles, but because an unsuitable adhesive was used or the installation process was incorrect.
This guide covers how to choose the right adhesive, the correct installation method, best practices, technical considerations, and common mistakes to avoid.
Understanding Large Format & Vitrified Tiles What Are Large Format Tiles?
Large format tiles are generally tiles with one side measuring 600 mm (24 inches) or more. Popular sizes include:
| 600 × 600 mm
|
600 × 1200 mm
|
800 × 1600 mm
|
1200 × 1800 mm
|
1600 × 3200 mm (slabs)
|
These tiles create a spacious, seamless appearance with fewer grout joints, making them popular for premium residential and commercial projects.
What Are Vitrified Tiles?
Vitrified tiles are manufactured by firing clay, silica, quartz, and feldspar at extremely high temperatures. This creates a dense, hard, almost non-porous tile with water absorption typically below 0.5%.
Because they absorb very little moisture, ordinary cement mortar cannot develop sufficient mechanical bond strength with vitrified tiles. A polymer-modified tile adhesive is therefore essential for proper adhesion.

Why Ordinary Cement Mortar Is No Longer Enough
Traditional cement-sand mortar has been used for decades, but it is no longer suitable for modern large-format and vitrified tiles.
Common Problems With Cement Mortar
- Hollow-sounding tiles from poor contact between tile and substrate
- Tile debonding over time
- Cracked grout joints caused by movement
- Water seepage through poorly bonded areas
- Tile slippage due to uneven bedding
- Reduced durability in high-traffic areas
- Failure on vertical surfaces due to tile slippage
These issues increase repair costs and compromise the appearance and longevity of the installation.
Cement Mortar vs. Tile Adhesive: Comparison
The table below compares common bonding materials by classification and best-fit use case.
| Material | Bond Strength | Flexibility | EN 12004 Class | Best For |
| Ordinary cement mortar | Low | None | Not classified | Small conventional ceramic tiles only |
| Standard cement-based adhesive | Medium | Low | C1 | Small to mid-size ceramic tiles, dry interior floors |
| Polymer-modified adhesive | High | Medium | C2 | Vitrified & large format tiles, walls, wet areas |
| High-flex / rapid-set adhesive | High | High | C2 S1 / S2 | Large format on facades, terraces, expansion-prone substrates |
| Epoxy adhesive | Very High | Low-Medium | R2T | Chemical-resistant zones: labs, kitchens, industrial floors |

Why Large Format Tiles Require a Special Adhesive
Large-format tiles behave differently from conventional tiles because of their size and weight. A specialized adhesive addresses this with:
Higher Bond Strength
Forms a stronger bond between tile and substrate, reducing the risk of debonding.
Better Flexibility
Buildings naturally expand and contract with temperature change. Flexible (S1/S2) adhesives absorb this movement and reduce stress on the tile.
Extended Open Time
Typically 20–30 minutes, giving installers time to position and adjust large tiles before the adhesive begins to set.
Reduced Vertical Slip
On wall installations, specialized adhesives limit slippage, allowing accurate alignment while the adhesive cures.
Water and Moisture Resistance
High-quality adhesives hold their bond strength in wet environments such as bathrooms, kitchens, and balconies.
Long-Term Durability
A properly selected adhesive keeps the installation stable and durable for years, not just at handover.
How to Choose the Right Adhesive
When selecting an adhesive for large format and vitrified tiles, consider:
- Tile size and weight
- Tile material (porcelain, vitrified, ceramic, natural stone)
- Installation location (wall or floor)
- Indoor or outdoor application
- Exposure to moisture
- Substrate type (concrete, plaster, screed, existing tiles)
- Expected traffic load
Using the correct adhesive improves installation quality and reduces future maintenance costs.
Where Can It Be Used?
Residential Projects |
Commercial Projects |
Exterior Applications |
High-Traffic Areas |
| • Living rooms | • Shopping malls | • Building facades | • Retail stores |
| • Bedrooms | • Hotels | • Elevations | • Lobbies |
| • Bathrooms | • Hospitals | • Stone cladding | • Corridors |
| • Kitchens | • Airports | • Exterior walls | • Public spaces |
| • Balconies | • Educational institutions | ||
| • Terraces | • Office buildings |
Step-by-Step Installation Method
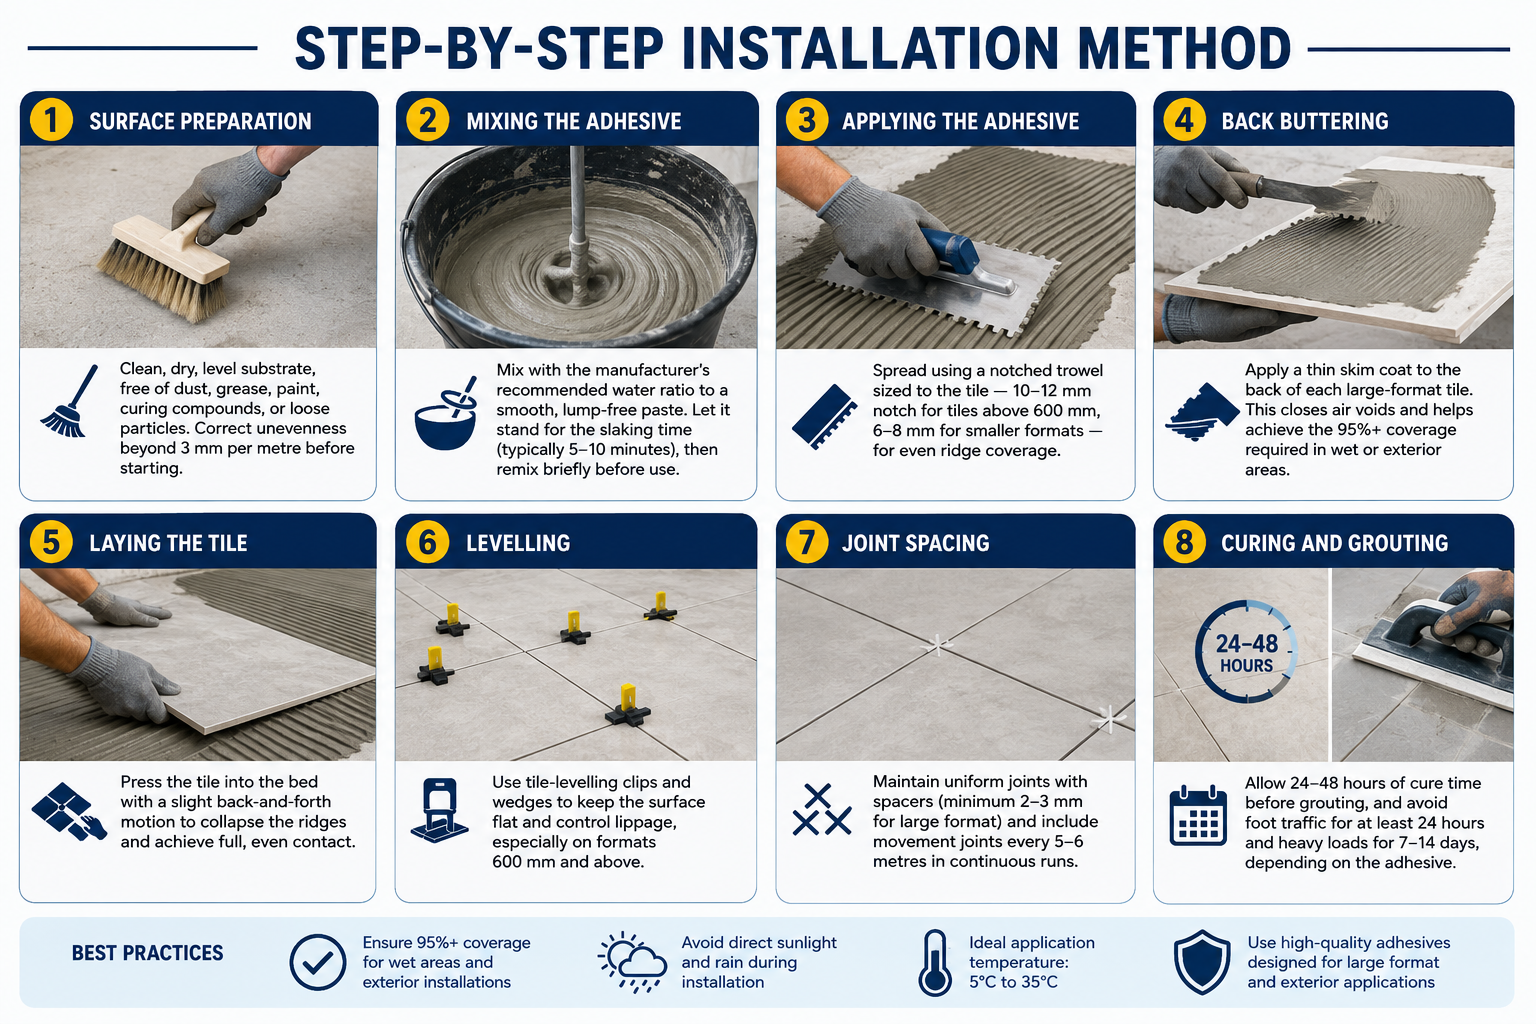
1. Surface Preparation
Clean, dry, level substrate, free of dust, grease, paint, curing compounds, or loose particles. Correct unevenness beyond 3 mm per metre before starting.
2. Mixing the Adhesive
Mix with the manufacturer’s recommended water ratio to a smooth, lump-free paste. Let it stand for the slaking time (typically 5–10 minutes), then remix briefly before use.
3. Applying the Adhesive
Spread using a notched trowel sized to the tile — 10–12 mm notch for tiles above 600 mm, 6–8 mm for smaller formats — for even ridge coverage.
4. Back Buttering
Apply a thin skim coat to the back of each large-format tile. This closes air voids and helps achieve the 95%+ coverage required in wet or exterior areas.
5. Laying the Tile
Press the tile into the bed with a slight back-and-forth motion to collapse the ridges and achieve full, even contact.
6. leveling
Use tile-leveling clips and wedges to keep the surface flat and control slippage, especially on formats 600 mm and above.
7. Joint Spacing
Maintain uniform joints with spacers (minimum 2–3 mm for large format) and include movement joints every 5–6 metres in continuous runs.
8. Curing and Grouting
Allow 24–48 hours of cure time before grouting, and avoid foot traffic for at least 24 hours and heavy loads for 7–14 days, depending on the adhesive.
Best Installation Practices
- Use the appropriate notch trowel for the tile size
- Ensure at least 95% adhesive coverage in wet or exterior areas
- Always back butter large-format tiles
- Do not spread more adhesive than can be tiled within the open time
- Avoid installation in extreme heat, cold, or direct sun
- Follow curing recommendations before loading the surface
- Maintain movement joints in large installations
Do’s and don’t
Do’s
- Prepare the substrate properly
- Follow the recommended mixing ratio
- Use the correct notched trowel
- Back butter large-format tiles
- Allow proper curing
- Follow the manufacturer’s installation instructions
don’ts
- Do not install over loose or contaminated surfaces
- Do not add extra water after mixing
- Do not exceed the adhesive’s open time
- Do not omit movement joints
- Do not use ordinary cement mortar for large-format vitrified tiles
Frequently Asked Questions
Which adhesive is suitable for large-format vitrified tiles?
A polymer-modified, cement-based adhesive rated C2 (or C2 S1/S2 for high flexibility) under EN 12004. It provides the bond strength and flexibility that vitrified tiles’ low water absorption demands.
Can ordinary cement mortar be used?
No. Cement mortar cannot form a strong mechanical bond with vitrified tiles’ dense, low-absorption surface, and it lacks the flexibility needed for large formats, leading to hollow tiles and debonding.
Is back buttering necessary?
Yes, for any tile 600 mm or larger. Back buttering closes air voids behind the tile and helps meet the 95%+ coverage required for wet or exterior installations.
How long should I wait before grouting?
Typically 24–48 hours after tiling, depending on the adhesive and site conditions. Always confirm the exact time on the manufacturer’s technical data sheet.
Can the adhesive be used outdoors?
Yes, provided you choose a weather- and UV-resistant, high-flexibility (S1/S2) adhesive rated for exterior use, such as on facades, terraces, or cladding.
Is it suitable for wet areas?
Yes. A C2-rated waterproof adhesive is suitable for bathrooms, kitchens, and balconies, provided coverage reaches at least 95% to prevent water ingress behind the tile.
What tile sizes require special adhesives?
Tiles with any side 600 mm or larger, and all vitrified or porcelain tiles regardless of size, require a specialized polymer-modified adhesive rather than standard mortar.
Can it be applied over existing tiles?
Yes, with a tile-on-tile rated adhesive, provided the existing tiles are sound, clean, degreased, and mechanically keyed or primed as the manufacturer specifies.
What is the recommended adhesive thickness?
Typically 3–5 mm after the tile is pressed into place, achieved using a notched trowel sized to the tile format — larger tiles need a deeper notch.
How can I prevent hollow tiles?
Back butter every large-format tile, use the correct trowel notch, achieve full contact with a back-and-forth press, and confirm coverage meets or exceeds 95%.
Conclusion
Large-format and vitrified tiles offer outstanding aesthetics and durability, but their performance depends heavily on the quality of the adhesive and the installation process. Choosing a high-performance, correctly rated tile adhesive, following proper installation techniques, and adhering to the manufacturer’s recommendations will help ensure a durable, safe


